Appendix I: F-950 Controller Software and Sensor Calibration
The F-950 Controller software offers real-time monitoring, controlling as well as calibrating multiple F-950/F-900 devices from standard USB connection.
Instructions:
- Open the F-950 Controller software
- Connect the F-950 to the computer using the mini-USB to USB cable.
- In F-950 device Setup>Mode>USB menu, select Controller mode.
- In Controller software, the device series should show up in the device list at top-left corner. Click on the device series to select device. Note: when connecting device to your computer for the first time, it may take a minute for the device to show up in the left panel.
- Monitoring information from your device should display in monitor tab.
- For more information on using the controller software to calibrate the F-950, navigate to the FAQ page on the F-950 support webpage:
https://felixinstruments.com/support/F-950/
and select How do I calibrate the instrument?
Ethylene (C2H4) PPM Sensor Calibration
Setting the Zeroes (Offset) with Potassium Permanganate (KPMnO4) *daily
Takes approximately 5 minutes
- Place fresh potassium permanganate (KMnO4) in the external conditioning tube
- Connect the conditioning tube to the intake and outake of the F-950 utilizing Viton tubing (see photo)
- Power on the F-950 and when ‘Measure’ is selected, right arrow key and allow to run for 3 minutes to stabilize
- Navigate back to the main menu and select Setup > Set Zero, press the right arrow key to initiate.
- When the instrument has set zero, a beep sounds and the word ‘OK’ appears.
Ethylene (C2H4) Sensor Set Span *6 months
- Connect the high resolution flowmeter, Ethylene calibration gas, and 950 intake ports together using a T-junction of tubing. If a sample bag of ethylene is being used, make a connection from the 950 intake port to the bag using the huber needle.
- On the 950, begin measure mode.
- Scroll through the graphs on the 950 (use the up and down arrow keys) so that it is displaying the C2H4 concentration graph.
- Set the flowrate on the C2H4 gas tank so that the flow meter reads roughly 70 mL/min. If the 950 gives a “Flow Blocked” error, then increase the flow on the meter by 10 mL/min and begin measure mode on the 950 again. If the error persists, contact tech support. If a sample bag is being used, skip this step.
- Let the 950 read the gas for three minutes.
- In the controller software, in the C2H4 field, set the concentration to the value of the calibration gas being used. Then hit the “Set Span” button.
- The concentration on the 950 should now read the same as the calibration gas within 5% ± .5 ppm.

Ethylene (C2H4) Sensor Verification *After Setting the Span
Perform this process immediately after calibrating (set span) the ethylene sensor on the 950
- Connect the high resolution flowmeter, Ethylene verification gas, and 950 intake ports together using a T-junction of tubing. If a sample bag of ethylene is being used, make a connection from the 950 intake port to the bag using the huber needle.
- On the 950, begin measure mode.
- Scroll through the graphs on the 950 (use the up and down arrow keys) so that it is displaying the C2H4 concentration graph.
- Set the flowrate on the C2H4 gas tank so that the flow meter reads roughly 90 mL/min. If the 950 gives a “Flow Blocked” error, then increase the flow on the meter by 10 mL/min and begin measure mode on the 950 again. If the error persists, contact tech support. If a sample bag is being used, skip this step.
- Let the 950 read the gas for three minutes.
- The 950 should read the same value as the verification gas within 5% ± .5 ppm. If it does not, repeat the “Ethylene Sensor Calibration” section above.
Carbon Dioxide (CO2) PCT Sensor Calibration
Setting the Zeroes (Offset) with Nitrogen Gas (N2) *6 months
Perform the set zero before the set span process. *User also has the ability to zero the sensor utilizing Soda Lime on closed loop and connecting to the controller software the same way.
- Connect the high resolution flow meter, N2 gas, and 950 intake ports together using a T-junction of tubing. If a sample bag of N2 is being used, make a connection from the 950 intake port to the bag using the huber needle.
- On the 950, begin continuous measure mode.
- Set the flowrate on the N2 gas tank so that the flow meter reads roughly 90 mL/min. If the 950 gives a “Flow Blocked” error, then increase the flow on the meter by 10 mL/min and begin measure mode on the 950 again. If the error persists, contact tech support. If a sample bag of N2 is being used, skip this step.
- Let the 950 read the gas for five minutes

- In the controller software, select CO2 in the “Zero sensors” field, then click the “Set Zero” button
- The 950 should now read 0 for the CO2 sensor
Carbon Dioxide (CO2) PCT Sensor Set Span *6 months
Perform the set zero before the set span process.
- Connect the high resolution flow meter, CO2 calibration gas, and 950 intake ports together using a T-junction of tubing. If a sample bag of CO2 is being used, make a connection from the 950 intake port to the bag using the huber needle.
- On the 950 begin measure mode.
- Scroll through the graphs on the 950 (use the up and down arrow keys) so that it is displaying the CO2 concentration graph.
- Set the flowrate on the CO2 gas tank so that the flow meter reads roughly 90 mL/min. If the 950 gives a “Flow Blocked” error, then increase the flow on the meter by 10 mL/min and begin measure mode on the 950 again. If the error persists, contact tech support. If a sample bag is being used, skip this step.
- Let the 950 read the gas for three minutes.
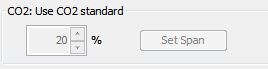
- In the controller software, in the CO2 field, set the concentration to the value of the calibration gas being used. Then hit the “Set Span” button.
- The concentration on the 950 should now read the same as the calibration gas within 5%.
Carbon Dioxide (CO2) PCT Sensor Verification *After Set Span
Perform this process immediately after calibrating the carbon dioxide sensor on the 950
- Connect the high resolution flow meter, CO2 verification gas, and 950 intake ports together using a T-junction of tubing. If a sample bag of CO2 is being used, make a connection from the 950 intake port to the bag using the huber needle.
- On the 950 begin measure mode.
- Scroll through the graphs on the 950 (use the up and down arrow keys) so that it is displaying the CO2 concentration graph.
- Set the flowrate on the CO2 gas tank so that the flow meter reads roughly 90 mL/min. If the 950 gives a “Flow Blocked” error, then increase the flow on the meter by 10 mL/min and begin measure mode on the 950 again. If the error persists, contact tech support. If a sample bag is being used, skip this step.
- Let the 950 read the gas for three minutes.
- The 950 should read the same value as the verification gas within 5%. If it does not, repeat the “Carbon Dioxide Sensor Calibration” section above.
Oxygen (O2) Sensor Calibration
Setting the Zeroes (Offset) with Nitrogen Gas (N2) *6 months
- Connect the high resolution flow meter, N2 gas, and 950 intake ports together using a T-junction of tubing. If a sample bag of N2 is being used, make a connection from the 950 intake port to the bag using the huber needle.
- On the 950, begin continuous measure mode.
- Set the flowrate on the N2 gas tank so that the flow meter reads roughly 90 mL/min. If the 950 gives a “Flow Blocked” error, then increase the flow on the meter by 10 mL/min and begin measure mode on the 950 again. If the error persists, contact tech support. If a sample bag of N2 is being used, skip this step.
- Let the 950 read the gas for five minutes

- In the controller software, select O2 in the “Zero sensors” field, then click the “Set Zero” button
- The 950 should now read 0 for the O2 sensor
Oxygen (O2) Sensor Set Span *6 months
- Connect the high resolution flow meter, O2 calibration gas, and 950 intake ports together using a T-junction of tubing. If a sample bag of O2 is being used, make a connection from the 950 intake port to the bag using the huber needle.
- On the 950 begin measure mode.
- Scroll through the graphs on the 950 (use the up and down arrow keys) so that it is displaying the O2 concentration graph.
- Set the flowrate on the O2 gas tank so that the flow meter reads roughly 90 mL/min. If the 950 gives a “Flow Blocked” error, then increase the flow on the meter by 10 mL/min and begin measure mode on the 950 again. If the error persists, contact tech support. If a sample bag is being used, skip this step.
- Let the 950 read the gas for three minutes.

- In the controller software, in the O2 field, set the concentration to the value of the calibration gas being used. Then hit the “Set Span” button.
- The concentration on the 950 should now read the same as the calibration gas ± 5%.
Oxygen (O2) Sensor Verification *After Set Span
Perform this process immediately after calibrating the oxygen sensor on the 950
- Connect the high resolution flow meter, O2 verification gas, and 950 intake ports together using a T-junction of tubing. If a sample bag of O2 is being used, make a connection from the 950 intake port to the bag using the huber needle.
- On the 950 begin measure mode.
- Scroll through the graphs on the 950 (use the up and down arrow keys) so that it is displaying the O2 concentration graph.
- Set the flowrate on the O2 gas tank so that the flow meter reads roughly 90 mL/min. If the 950 gives a “Flow Blocked” error, then increase the flow on the meter by 10 mL/min and begin measure mode on the 950 again. If the error persists, contact tech support. If a sample bag is being used, skip this step.
- Let the 950 read the gas for three minutes.
- The 950 should read the same value as the verification gas ± 5%. If it does not, repeat the “Oxygen Sensor Calibration” section above.
Continuous Mode Verification *After Set Span
The following procedure is to check whether the sensors were calibrated to read within spec of the actual gas value. It is highly recommended that this step be performed after one full day has passed since the calibration was performed. If this step is not performed, accuracy of the calibration cannot be verified.
Repeat the verification sections from above for each gas and record the results here after three minutes (at least) of measure time. If any of the values are out of specification, check your procedure and recalibrate the sensor again.
| Gas | 950 Results | ± 5% of standard gas |
|---|---|---|
| Air (Air is ~20.9% O2) | □Yes □No | |
| CO2 Verification Gas | □Yes □No | |
| O2 Verification Gas | □Yes □No |
| Gas | 950 Results | 5% ± .5 PPM of standard gas |
|---|---|---|
| C2H4 PPM Verification Gas | □Yes □No |
For information on sourcing known gases required for calibration, please refer to the following website to inquire about your region: